now, others can be added later (sticky, shape keys). Beside one small fix
for knife exact vertex group interpolation, is intended to work the same
as before.

Also fixes bug #5200, related to editmode undo and vertex groups. And
corrects the editmode to faceselect mode selection conversion, that was
broken in a previous commit.
Major sequencer rewrite to add Speed Control effect.
Changes:
- Cleaned up large parts of sequence.c removing a lot of unnecessary code.
  (We first built old seqar array to decide, what is visible, then build
   dependencies with new code, then used old code to iterate through the
   strips and deciding using new code what is used and so forth and so on...)
  Should be much faster now.
- Now we build the strips recursively thereby elemenating the need of a
  seperate dependency calculation.
- Added a Speed-Control effect to change strip speed afterwards.
  (Offers global speed as well as IPO-controlled speed.
   There are several modes to play with:
   - Control by velocity (IPO = velocity where 1.0 is normal speed)
   - Control by frame number (IPO = target frame)
   - IPO-Value can be rescaled to frame-value, to make frame exact matching
     possible. (Matching video tracks to audio tracks with IPOs ;-)

Demo-Blend file is here http://peter.schlaile.de/blender/sequencer/speedcontroltest.blend

Since this was also a Plumiferos request I hope to be mentioned in the
credits ;-)

Enjoy! And please test the new sequencer thoroughly. It is really more like
a rewrite this time.
THE OBJECT PROXY

Or simple said; local control of referenced data from libraries.
Having library files with references is a very common studio setup, and
Blender did do quite well in that area. Were it not that for character
setups it was impossible to use still.

This commit will enable a full rig+character to remain in the library,
and still have - under strict control - local access for animation edits.

Full log:
http://www.blender3d.org/cms/Proxy_Objects.824.0.html
the CustomData module from the modifier stack rewrite, but with additions
to make it also usable in edit mode. Some of the datatypes from that
module were move to a DNA header file, they are not saved to file now, but
will be soon.

The only code that wasn't abstracted is the uv collapse / merging code. It
is rather complicated, will look into that in the future.

There should be no user level changes.
This adds support for "generator effect strips", which don't need necessarily
an input strip and my version of Matt Ebb's [ #5035 ] 'Solid Color'
sequence strip.

TODO: With a little bit more tweaking it will be possible to make animated
effect plugins and my still unfinished "Bake"-Strip.

For the 'Solid Color'-Effect, to quote Matt:
This is nice and simple, just provides a solid colour that's set in a colour picker in the properties popup. This is something we've needed for a long time, and I got totally sick of having to make 'black.png' and 'white.png' just to do fades, so I coded this.
Added enhancements by blendix (Patch #4919: Insert sequence effect between)

It adds the following things:
- You can add a sequence strip afterwards in the middle of an effect chain
  (you have to move strips around before, so that there is "room" for it.
   Blender will ask you then, if you want to add in between or after the
   selected strips)
- In the case you messed it up and want your effect strips to be reassigned in
  a different way, there is the new "R"-key. Just select three arbitrary
  strips and press "R". If you don't create a cycle, those will be connected
  to a new effect chain.
- Fixed freeing of imbufs on changes to properly take into account dependencies.  An example of a simple case that went wrong is one image strip with two
  glow effects, changing the parameters of the first glow strip will not
  result in any updates. Basically only direct dependencies were taken into
  account, which resulted in the image preview not being updated in some cases.
- Let the sequencer detect an active sequence strip if none is defined, to
  get rid of annoying error messages when trying to add an effect to a
  selected sequence strip right after loading a file.
- Delete is less destructive. If you delete somewhere between other strips,
  Blender now tries to relink in a reasonable way.
- The active sequence strip is now displayed with a light instead of a dark
  outline, which makes it easier to spot, and is especially useful for the
  tools using the active sequence strip.
- Ability to view the final result when editing inside meta strip.
  The channel button was modified to also allow negative numbers,
  where -n is n levels up the meta stack. There is probably a nicer way to
  specify this, instead of (ab)using the channel button, but this seems to
  work quite efficient.
- Also a small bugfix: don't crash on loading files from newer versions with
  an unknown effect strip.
#5061 - Ipo/Action 'Cleaning'
#5071 - 'Only Needed' Keyframing Option

====================

* IPO/Action 'Cleaning':
It removes un-necessary keyframes from individual ipo curves.
- In both editors, the hotkey is currently the OKEY.  Also accesable from menus of each editor.
- There is currently a 'threshold' popup. This sets the value that the cleaner uses to determine if two keys have same time/value

There are a few improvements that could still be made, such as:
- There are a few cases that it still doesn't handle yet, such as when un-needed keyframes lie on a linear line (and similiar cases). This shall be improved soon.
- Also, for some reason, after running cleaning while in ipo editor editmode, all but the active curve are hidden.

====================

* 'Only Needed' Keyframing Option:
This patch adds a new keyframing option for objects and bones. It only adds keyframes where they are needed, judging from the surrounding points on that curve.

Notes about this keyframing option:
- Works like the existing 'Avail' option, except it checks if the keyframe
is needed.
- Currently uses hardcoded threshold for determining if same value.

[quote]
/* Cases where keyframes should not be added:
*       1. Keyframe to be added bewteen two keyframes with similar values
*       2. Keyframe to be added between two keyframes with similar times
*       3. Keyframe lies at point that intersects the linear line between two
keyframes
*/
[/unquote]
Enable to use Xkey or DEL for deleting objects in outliner.

Note: there's reasons to be a bit reluctant with extensions like this.
Mostly related to the fact that outliner operations is completely unfinished
still. We need to spend time on thinking over how it should evolve, and
based on that the proper hotkeys and menus can be added as well.
This enables finding data in the Outliner.
Usage: Fkey (partial strings), CTRL+Fkey (partial strings, case sensitive).
SHIFT+Fkey to repeat a search, this cycles around.

Extra changes:
- button popups to enter strings now starts activated.
- outliner either shows for Armature the Bones, or Posechannels or
  Editbones,  depending the mode. Was needed to make searches meaningful.

Although Joshua did very good work on the key functions, there were a couple
of issues in his code, and problems in Outliner code, that didn't make it
all work nicely. So, this is quite a revised patch. :)

Full review log can be found in the patch tracker.
This patch adds a new option to the separate menu in editmode, 'By Material'.
It simply loops through all materials in the mesh selects the faces associated
with them and calls separate().

Thanks to Andrea Weikert for the patch!
Four more selection options in Curve editing;
- select more/less (ctrl+numpadplus/minus)
- select first/last point

All nice in menus and toolbox even!

Patch note: had to fix bugs in using 'continue' inside of while() loops.
Turned all oldstyle while() in for() for going over lists.
If you rename a Constraint, the used Constraint Channels (Ipo curves) were
not renamed as well, making animations not work anymore.

Now renaming works up to this level:
- own object constraints
- own object Action constraints

This is identical to Bone renaming. Note that other actions (like in NLA)
are not corrected for renaming. Have to look at ways to provide that once.
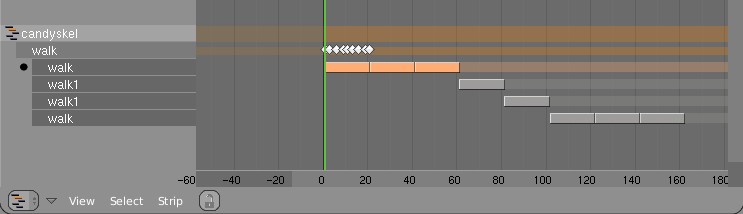
- FORWARD CYCLING & MATCHING

Up to no now, adding multiple actions in NLA with walkcycles required to
animate them standing still, as if walking on a conveyor belt. The stride
option then makes the object itself move forward, trying to keep the foot
stuck on the floor (with poor results!).
This option now allows to make walk cycles moving forward. By
indicating a reference Offset Bone, the NLA system will use that bone to
detect the correct offset for the Armature Pose to make it seamlessly going
forward.

Best of all, this option works as for cyclic Action Strips as well as for
individual Action Strips. Note that for individual strips, you have to set
the strip on "Hold". (Might become automatic detected later).

Here's an example edit image for NLA:
http://www.blender.org/bf/nla_match-cycle.jpg
And the animation for it:
http://download.blender.org/demo/test/2.43/0001_0150_match.avi
Blender file:
http://download.blender.org/demo/test/2.43/mancandy_matching.blend

Using this kind of cycling works pretty straightforward, and is a lot
easier to setup than Stride Bones.

To be further tested:
- Blending cycles
- matching rotation for the bones as well.

- ACTION MODIFIERS (motion deformors)

The above option was actually required for this feature. Typically walk
cycles are constructed with certain Bones to be the handles, controlling
for example the torso or feet.
An Action Modifier allows you to use a Curve Path to deform the motion of
these controlling bones. This uses the existing Curve Deformation option.
Modifiers can be added per Action Strip, each controlling a channel (bone)
by choice, and even allows to layer multiple modifiers on top of each other
(several paths deforming motion). This option is using the dependency graph,
so editing the Curve will give realtime changes in the Armature.

The previous walkcycle, controlled by two curves:
http://download.blender.org/demo/test/2.43/0001_0150_deform.avi
Blender file:
http://download.blender.org/demo/test/2.43/mancandy_actiondeform.blend

Action Modifiers can be added in the NLA Properties Panel. Per Modifier you
have to indicate the channel and a Curve Object. You can copy modifiers from
one strip to another using CTRL+C (only copies to active Object strips).

Setting up a correct Curve Path has to be carefully done:
- Use SHIFT+A "Curve Path" in top view, or ensure the path is not rotated.
- make sure the center point of the Curve Object is at the center of the
  Armature (or above)
- move the first point of the curve to the center point as well.
- check if the path starts from this first point, you can change it using
  (in Curve EditMode) the option Wkey -> "Switch Direction"
- Make sure alignment uses the correct axis; if the Armature walks into
  the negative Y direction, you have to set in Object Buttons, "Anim settings"
  Panel, the correct Track option. (Note; option will probably move to the
  Modifier later).

This is a good reason to make such paths automatic (on a command). Is on the
todo list.

Also note this:
- the Curve Path extends in beginning and ending, that's (for now) the default,
  and allows to use multiple paths. Make sure paths begin and end horizontal.
- Moving the Curve in Object Mode will change the "mapping" (as if the landscape
  a character walks over moves). Moving the Curve in Edit Mode will change the
  actual position of the deformation.
- Speed (Ipos) on paths is not supported yet, will be done.
- The Curve "Stretch" deform option doesn't work.
- Modifiers are executed *after* all actions in NLA are evaluated, there's no
  support yet for blending multiple strips with Modifiers.
- This doesn't work yet for time-mapping...

This commit is mostly for review by character animators... some details or
working methods might change.
This feature can also be used for other modifiers, such as noise (Perlin) or
the mythical "Oomph" (frequency control) and of course Python.

Special thanks to Bassam & Matt for research & design help. Have fun!
Embryon functionnality for snapping.

- Only snaps to grid on translations (grab)
- Transform constraints are supported but header display is wrong.
- Can be turned on/off in the Object/Mesh header menu under Transform Properties (tentative spot, will have to integrate better and in other object type menus too)
- Can be turned on/off during transform with ` (Back Quote, also tentative)

This is, of course, very much Work in Progress.

This implements part of the structural ideas for the transform cleanup I've been juggling around with.
* added two files from verse-master
* server list is available in outliner (new mode "Verse Servers")
* verse sessions are now also in new mode "Verse Sessions" in outliner
* fixed drawing of verse sessions and their nodes
* in user preferences System & OpenGL master-server ip setting (default master.uni-verse.org)
* in File>Verse entry "Get Servers" to get server list or
* RMB on "Available Verse Servers" in outliner to "Refresh" server list

Enjoy :)
This patch adds the feature of IPO curve mirroring. It mirrors the selected keyframes in the active ipo curves over a user-nominated mirror-line.

Options are:
- Mirror over current frame
- Mirror over vertical axis (X = 0)
- Mirror over horizontal axis (Y = 0)

Functionality can be accessed from:
- Hotkey M in IPO editor
- Submenu in header of IPO editor
Some operations like edge loop deselect would cause selection history
to become invalid. Added a sanity check to countall() to try and catch
these when they happen.
The wait cursor was being called during editmode enter and exit for meshes.
This was a problem for several reasons. First of all, python modules like
Mesh now make use of editmode features. These methods that wrap editmode
tools may be called many times during the execution of a script
and lead to the wait cursor rapidly flickering on and off.

The other problem was that the wait cursor wasn't being called for editmode
enter and exit of all data types. This is unified now.

-New Arguments

enter_editmode() should be passed a nonzero integer or simply EM_WAITCURSOR
if the wait cursor is desired. Currently only the python API passes a '0'
to enter_editmode()

exit_editmode() has several options and they are passed in as the bitflags
EM_FREEDATA, EM_FREEUNDO and EM_WAITCURSOR. These flags are defined in
BDR_editobject.h.
- A new Save image function, next to the existing Save As.
- Shortcut keys Alt+S, Alt+R, Alt+O and Alt+N for Save, Reload, Open
  and New image respectively, consistent with the text editor window.
- Hide Select and UVs menus when UV editing isn't active.
- Removed duplicate and unused code, also moved some functions.
Bugfix for #4971: Scene.unlink() was incorrectly decrementing the datablock
user count whenever an object was removed from a scene, instead of only when
the object's count reached 0.  The Python code was modified to use the
existing free_and_unlink_base() function (with some modifications to allow
specifying a scene).  Also fixed a bug with the undocumented return codes
from the method; it now returns True if the object was found in the scene.
module itself, replacing the special MEM_mallocT/MEM_freeT functions.
Mutex locking is only enabled when threads are running.

There was no good reason to have these separate, it just led to ugly
hacks when calling functions with non-threadsafe malloc from threads.
In a quick glance: (temp image)
http://www.blender.org/bf/rt.png

Main reason is that Lattices are useful a lot for Armature deformation.
Lattices just provide much more precise and interesting control. However,
with only bone envelopes it's very hard to use.

Working with Lattice vertex groups is nearly identical to Mesh:
- on CTRL+P 'make parent' you can choose the deform option now
- In editmode, the buttons to control vertex groups are available
- In outliner you can select vertexgroups too
- Deforming Lattices with Armatures has all options as for Mesh now.

Note:
- No WeightPaint has been added yet. To compensate, the editmode
  drawing for a Lattice with vertex group shows weight values for the active
  vertex group.
- Lattice editmode doesn't undo/redo weight editing yet.
- Softbody for Lattice still uses own vertex weights

Implementation notes:
- derivedmesh weight_to_rgb() is now exported to drawobject.c
- been doing cleanups in code (order of includes, var declarations, etc)
- weightpaint button handling now is generic

I've checked on Brecht's proposal for Custom Element data;
http://mediawiki.blender.org/index.php/BlenderDev/CustomElementData
It could have been used, but that would mean the existing code for
vertexgroup handling and armature deform couldn't be re-used. I guess this
is really a later todo.
This provides a weight-paint option that only paints on vertices that have
already the weight-group assigned before. The default adds weights on all
vertices painted on.

Fixes in patch include:
- much less code
- also support for 'filter' mode
- proper code styling
exception of the clone tool.

One level undo for image- and texturepaint, only storing those tiles
that changed.

Test to improve texturepaint performance using glTexSubImage2D, only
enabled with 2^n sized textures and mipmapping off. Painting a 2048x2048
texture is then pretty smooth here, as long as the geometry is not too
complex.
This is a much faster and easier way to give a bevelled curve a taper, without
using taper curves. Each point on a curve now has a 'radius' value that you can
shrink and fatten using Alt S, which will influence the taper when the curve is
bevelled (either with a bevob, or with front/back turned off and a bevel dept
set). Alt S shrinks and fattens the selected points in an interactive transform,
and you can set an absolute radius for selected points with 'Set Radius' in the
curve specials menu.

See demo: http://mke3.net/blender/etc/curve_shrinkfatten-h264.mov

This can be a quick way to create revolved surfaces (eg.
http://mke3.net/blender/etc/wineglass-h264.mov ) and it would be very
interesting to use this radius value in other tools, such as a 'freehand curve'
tool that would let you draw a curve freehand, with the radius affected by pen
pressure, or even using the radius at each point to control curve guides for
particles more precisely, rather than the continous maxdist.
images (like used for rendering icons).

When working during Orange on new render pipeline, I've left this topic
alone for a while... subpixel precision testing is very time consuming and
needs concentration for a while. :)

This commit brings back precision as it was for 2.41. Below a short
explanation of the solved issues.

- the window matrix for rendering is kept constant during all OSA passes,
  this to ensure clipping happens for each pass identically.
- a subpixel offset is only applied on filling in the z-buffer
- this offset is inverse corrected for shadepixel code, only on 2 places

Another nasty issue is that for filtered rendering (gauss etc), the tiles
(or entire image) is temporally increased 2 pixel in size. This caused a
'dark' (or sky color) edge on the rendering. During Orange that was solved
with a hardcoded clipping offset value, which only corrected for larger
pictures (like > 500 pixels in size).
Now this clipping offset is correctly calculated, based on render size.

Last issue: the view border in 3d window was calculated using integers,
giving small errors in display too. Now it uses float, so visually the
view border is more close to what a render shows.
Previously the knife tool only allowed you to cut through edges. This
approach is limited however, since many times you want to cut through
vertices in order to create precise cuts or terminate a cut in a specific
way. Blenders knife tool now supports cutting through vertices as
demonstrated in these pictures:
http://briggs.zanqdo.com/newknife1.jpghttp://briggs.zanqdo.com/newknife2.jpg
Since the vertex intersection code is very precise, vertex snapping has
been added to the knife tool to assist the user when they wish to cut
through vertices and can be toggled by pressing and holding the 'alt' key.
Notes:
-Vertex cutting and vertex snapping are only available when using the
'knife exact' option.
-Added various fixes to the precision of the knife tool.
- buffer overflow was possible with providing a file path argument longer
  than 256 characters.
- buttons "VCol Light" and "VCol Paint" were not mutual exclusive
- quicktime error menu (unable to create) had a enter in end
- deleting points in CurveMapping button (like Curves node in compositor)
  did not give proper recalc event
- edges render menu had a tooltip still mentioning the unified render
- pending commit for OSX intel systems, with intel graphics. These now call
  an extra swapbuffers after glFlush(). Code is ifdeffed, and doesnt affect
  other systems.

- show-off commit: option to have transparent nodes over the composite
  result. Only draws Image for active Viewer Node now, and image doesnt
  translate nor zoom (which isnt bad though).
  Set in themes the alpha color of "node backdrop" to make nodes
  transparent.
- ImagePaint now uses ImBuf directly, and the rect blending functions
  were moved into the imbuf module.
- The brush spacing, timing and sampling was abstracted into brush.c, for
  later reuse in other paint modes.

Float ImagePaint support.

Textured Brushes:
- Only the first texture channel is used now.
- Options for size and offset should be added, but need to find some space
  in the panel, or add a second one ..
- Code for brush spacing and timing was rewritten, making spacing more even.
  Example: http://users.pandora.be/blendix/brush_spacing.jpg
- Instead of Stepsize for regular brushes and Flow for airbrushes, there is
  now Spacing for both, and Rate for airbrushes.
- Airbrush now works more like it does in the Gimp now, by maintaining the
  spacing even if the brush moves faster than the painting rate.

- Some preparations to make brushes work in texture paint mode.
- Added a new Brush datablock, only used by image paint, but intended
  to be used in texture paint, vertex paint, weight paint and sculpt
  mode also.
- Being a datablock, these brushes can be saved, appended and linked.
  They have a fake user by default, to make sure they are saved even if
  not selected.

Image Painting:

- Replaced the img module with C code in imagepaint.c
- Airbrush is no longer a separate tool, but rather an option that can
  be used for soften, smear and clone also.
- Blend modes mix, add, subtract, multiply, darken and lighten have been
  added, code taken directly from vertex paint.

Note to project files maintainers:

- The img module was removed from SCons and Makefiles, and this should
  be done in other build systems also. I'll wait to remove the module
  from cvs, to not break compilation.
The F3 key 'save rendered image' made inconsistant choices to save either
in jpg or tga, when the output panel was indicating to render to movies.
Even worse, it was sometimes saying 'save jpg' and saved a targa!

Made it consistantly save .jpg now, since tga isn't a good common format.

2)
Forgot to commit transform.h for previous bugfix in transform numeric input